We know that your customer engagement strategy happens across systems. You need your messaging, analytics, support, and backend tools to talk to each other. And at their best, these platforms should work together to help you understand your users’ behavior and act on that data.
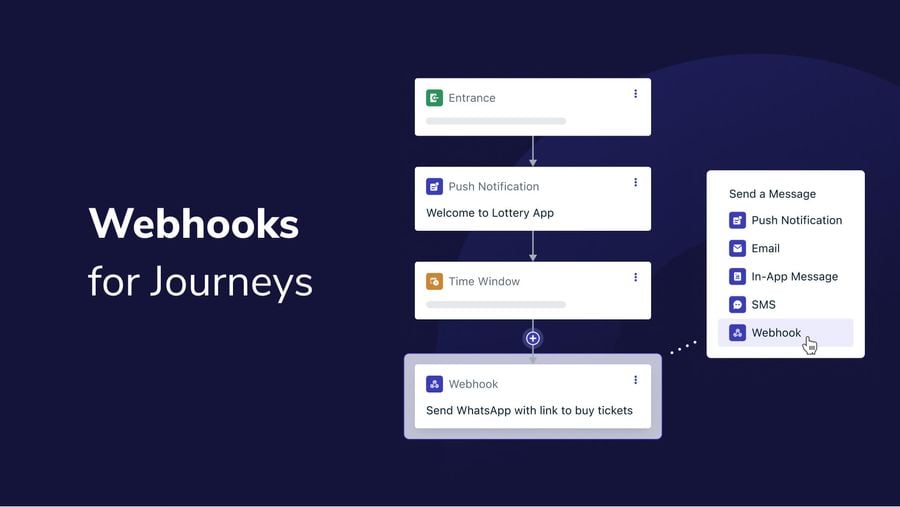
That’s why we’re excited to launch webhooks for Journeys. With this new feature, you can connect OneSignal Journeys to third-party tools directly from our intuitive visual builder. This means you can automate cohesive Live Config experiences, send messages on brand new channels, automatically send user information to tools like Zapier, and more from Journeys.
Create Cross-Platform Journeys
From a single source of truth, combine your OneSignal messaging with third-party tools to trigger WhatsApp messages, send a one-time batch of user information, and more. (And for ongoing data syncs, you can rely on our powerful suite of integrations with top analytics, attribution, data, and CMS platforms.)
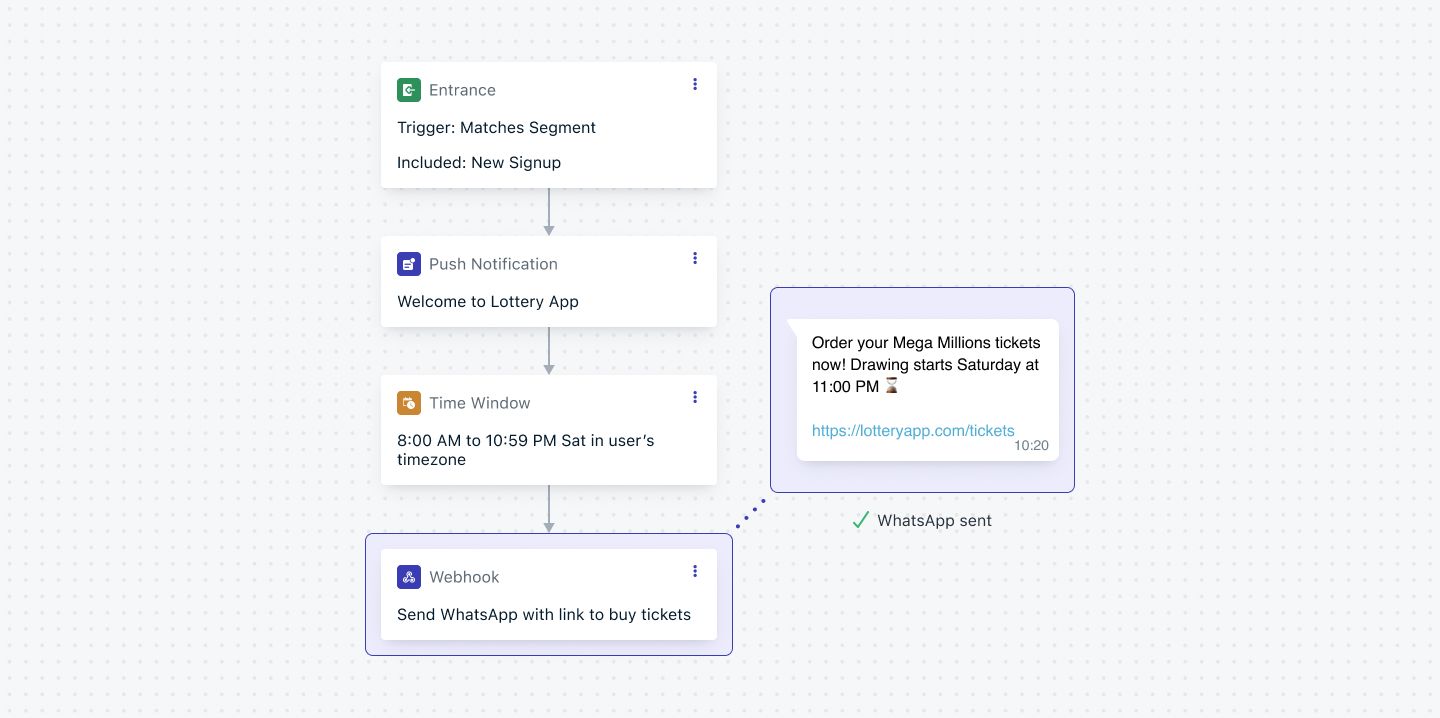
Webhooks for Journeys let you connect OneSignal with your:
- Backend system
- Business intelligence tool
- Other message providers
- Analytics tool
- Automation tools (e.g., Zapier)
- Support ticket system
- And more
…all from our intuitive visual builder. Use these connections to create cohesive customer journeys that extend across systems.
Craft Cohesive Customer Experiences
The foundation of any successful customer engagement sequence is a clear strategy and multiple touchpoints. Since you can now use Journeys to automate across platforms, this means that you can focus more time on getting your strategy right and less time synchronizing your various systems.
Here are a few ways you can use webhooks in Journeys to create high-impact sequences:
- Create cohesive Live Config experiences: Did a user redeem an in-app reward? Tell your backend system to add that bonus to that user’s profile.
- Reach out at the right time: Did an email subscriber complete a demand generation sequence? Update your CRM or BI system to show that they are ready to be reached out to by the sales team.
- Trigger personalized messaging on other channels: Is a user not engaging with your push or email campaigns? Get creative with your re-targeting by triggering direct mail or WhatsApp messages.
- Create support tickets based on user engagement: Did a recently canceled subscriber not give any in-app feedback on why they canceled? Give them a few days, and then create a support ticket to follow up.
- And more!
How to Use Webhooks in Journeys
1. Create a Journey
To get started, create a Journey and map out your messages, logic, and Data Tags. Once you’re ready to set up your webhooks, add a webhook step to your Journey.
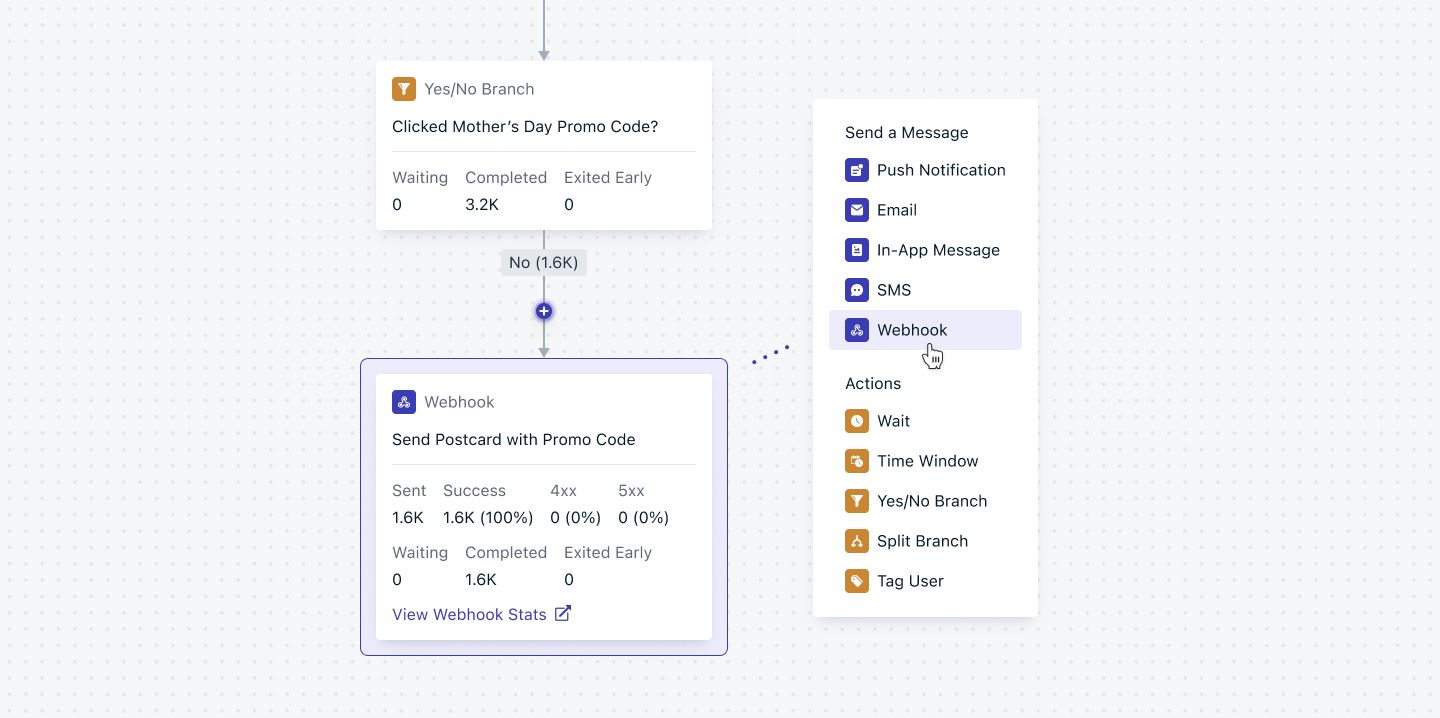
Want some Journeys inspiration? We’ve provided lots of detailed Journeys examples, including combining push and email and omnichannel messaging.
2. Configure your Webhook
Next, create your webhook template to send user data to the right URL in the target external tool.
3. Activate the webhook and set your Journey live!
Be sure to consult the preview before activating the webhook template. Once it’s finalized, the corresponding journey live! Check back in after a day or two to measure your results and tweak as necessary.
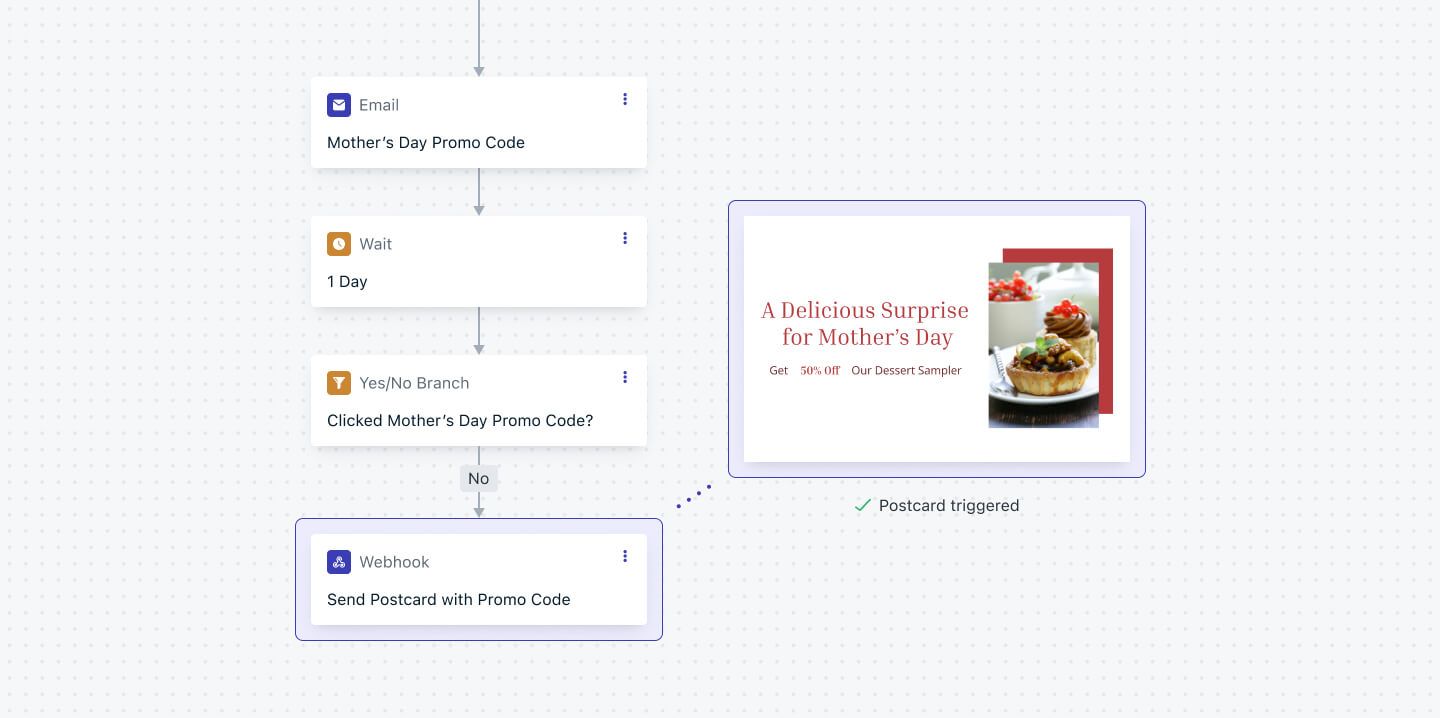
Learn More about Journeys Webhooks
This feature is available exclusively for our annual plans. To learn more about how your organization can use Journeys Webhooks and unlock access, reach out to our team.
Connect with Our Team